As we start some account should be created.
- Create Docker Hub account
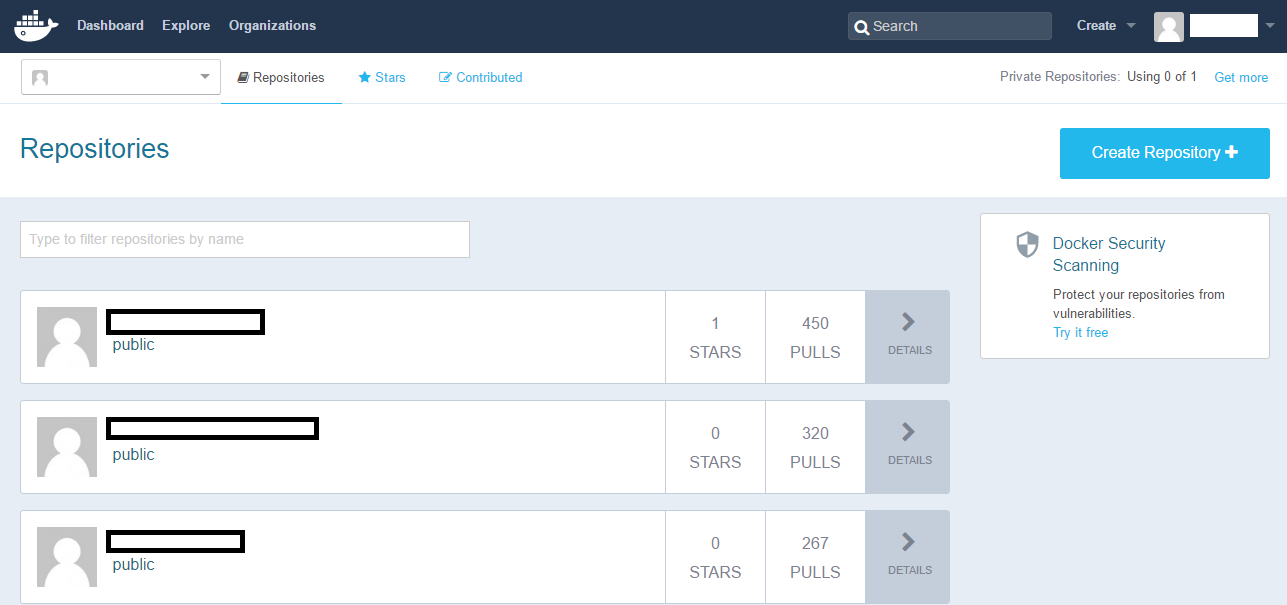
After the subscription and login you’ll navigated to your Dashboard (at start empty). on the top left menu press the Explore link – this will used us later as a base for our Docker.
The other thing that we need to set up is the source control provider. It’s only required when using automated build Docker.

Press the Create Automated Build linked, after it the Link Accounts button.
- Create & Manage Git Account
I believe that must of you have one of the source-controls Git / Bitbucket providers. In this post I will show how to use the Git source-control.
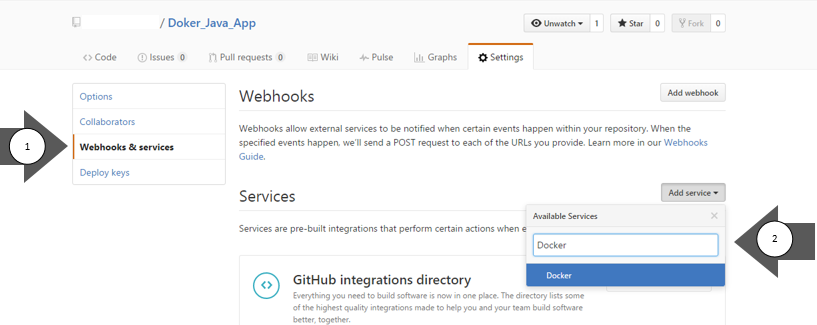
If you don’t have an account please open and create repository, each repository dedicate to a single Docker (I named it Docker_Java_App). Inside the Git repository press on the Settings link.

After it press on the Webhooks & services link, scroll to the Services section and search for the Docker service and install it.
Now the Git repository can contain the automated build Docker.
Go back to the Docker hut website and verify that the Docker have access to the Git. The Git website will open and permission request will ask to link them together.

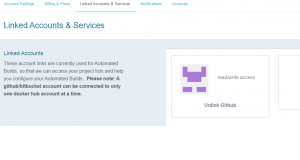
Authorize it and navigate back to the Docker Hub website. Under your account name (top right) can can navigate to the account setting once again. Press the Settings link and than press the Linked Accounts & Services link from the menu.

After the link completed the page should look like…
- Create Automated Build Docker
Now that all infrastructure setup, we can create the Automated Build Docker. Press the Created Automated Buildlink from the Create menu, than press on the Git Repository.

Select the Repository instance which you created earlier on the Git source-control. In our case the Docker_Java_Docker repository.

Fill the Repository card and press the Create button.

Now we have the skeleton of the Docker.

- Create Dockerfile {The best for me}
To run Docker you need to have an image that you'll launch into your docker and call it to run it.
Some other Blog will use WRONG methods that you need to connect you to Ubuntu machine and make a long process to create your image, and in the fact your image still fix and cannot be change never.
I would like to show you HOW CREATE right image just with simple Dockerfile text file:
For example, if you consider that following text is my Dockerfile:
FROM ubuntu:16.04
MAINTAINER Haim Bentouza
ENV DEBIAN_FRONTEND noninteractive
ENV DEBCONF_NONINTERACTIVE_SEEN true
# Update the repositories
RUN apt-get -yqq update
# Upgrade packages
RUN apt-get -yqq upgrade
# Install utilities
RUN apt-get -yqq install ca-certificates curl dnsutils man openssl unzip wget build-essential chrpath
# Install Java
ENV JAVA_VERSION=8
ENV JAVA_UPDATE=102
ENV JAVA_BUILD=14
ENV JDK_DOWNLOAD_URL="http://download.oracle.com/otn-pub/java/jdk/${JAVA_VERSION}u${JAVA_UPDATE}-b${JAVA_BUILD}/jdk-${JAVA_VERSION}u${JAVA_UPDATE}-linux-x64.tar.gz"
ENV JAVA_FILENAME="java-${JAVA_VERSION}-oracle.tar.gz"
ENV JAVA_HOME="/opt/java-${JAVA_VERSION}-oracle"
ENV PATH="${PATH}:/${JAVA_HOME}/bin:.:"
RUN wget --header "Cookie: oraclelicense=accept-securebackup-cookie" -q -O "/tmp/${JAVA_FILENAME}" "${JDK_DOWNLOAD_URL}" && \
tar -xzf "/tmp/${JAVA_FILENAME}" -C "/tmp" && \
mv "/tmp/jdk1.${JAVA_VERSION}.0_${JAVA_UPDATE}" "${JAVA_HOME}" && \
rm -rf ${JAVA_HOME}/*src.zip /tmp/*
RUN java -version
# Install Selenium
RUN mkdir -p /opt/selenium
RUN wget --no-verbose -O /opt/selenium/selenium-server-standalone-2.43.1.jar http://selenium-release.storage.googleapis.com/2.43/selenium-server-standalone-2.43.1.jar
RUN ln -fs /opt/selenium/selenium-server-standalone-2.43.1.jar /opt/selenium/selenium-server-standalone.jar
# Install PhantomJs
RUN apt-get -yqq install libssl-dev libxft-dev
RUN apt-get -yqq install libfreetype6 libfreetype6-dev
RUN apt-get -yqq install libfontconfig1 libfontconfig1-dev
RUN cd ~
ENV PHANTOM_JS="phantomjs-1.9.8-linux-x86_64"
RUN wget --no-verbose -U mozilla https://bitbucket.org/ariya/phantomjs/downloads/$PHANTOM_JS.tar.bz2
RUN tar xvjf $PHANTOM_JS.tar.bz2
RUN mv $PHANTOM_JS /usr/local/share
RUN ln -sf /usr/local/share/$PHANTOM_JS/bin/phantomjs /usr/local/bin
RUN phantomjs --version
# Install Chrome WebDriver
RUN wget --no-verbose -O /tmp/chromedriver_linux64.zip http://chromedriver.storage.googleapis.com/2.10/chromedriver_linux64.zip
RUN mkdir -p /opt/chromedriver-2.10
RUN unzip /tmp/chromedriver_linux64.zip -d /opt/chromedriver-2.10
RUN chmod +x /opt/chromedriver-2.10/chromedriver
RUN rm /tmp/chromedriver_linux64.zip
RUN ln -fs /opt/chromedriver-2.10/chromedriver /usr/local/bin/chromedriver
# Create a default user with sudo access
RUN useradd selenium --shell /bin/bash --create-home
RUN usermod -a -G sudo selenium
RUN echo "ALL ALL = (ALL) NOPASSWD: ALL" >> /etc/sudoers
# Download default Bot Jar
ADD https://location/file.jar /home/
You can see that base my image on official Ubuntu OS 16.04 and I'll install all components that I'll really need to launch on this image.
Like:
- Java 8
- PhantomsJs
- Selenium
- Chrome Driver
- Download default Jar file
- Save this Dockerfile.txt into your GitHub on the root folder.
The Docker-Hub: holds the Repository image binary data.
The Git-Hub: holds the Dockerfile(s) and scripts.
The Git-Hub: holds the Dockerfile(s) and scripts.
To do so we need to navigate to the “Build Settings” on the on the Automated Build repository – Docker-Hub website.
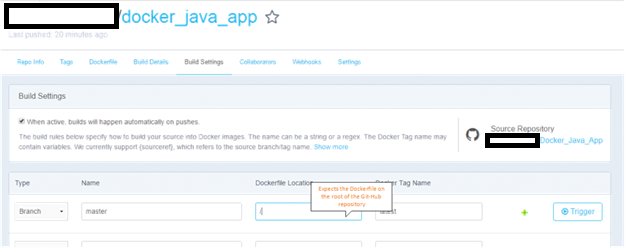
The first line it refer to the master branch with the latest tag. see that the Docker Location set to /. That mean that the Docker-Hub expects the Dockerfile to be located on the root of the attached Git-Hub repository. This can be modified (usually when supporting multiple Tags).
So, on the related Git-Hub we will place a Dockerfile with the same lines like we used on the linux machine – just load it to the root git folder.
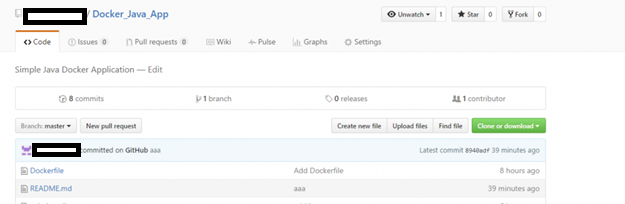
After you set the Dockerfile on the Git-Hub (give it a minute or two) your Dockerfile content will be show on the “Dockerfile” on the on the Automated Build repository – Docker-Hub website.
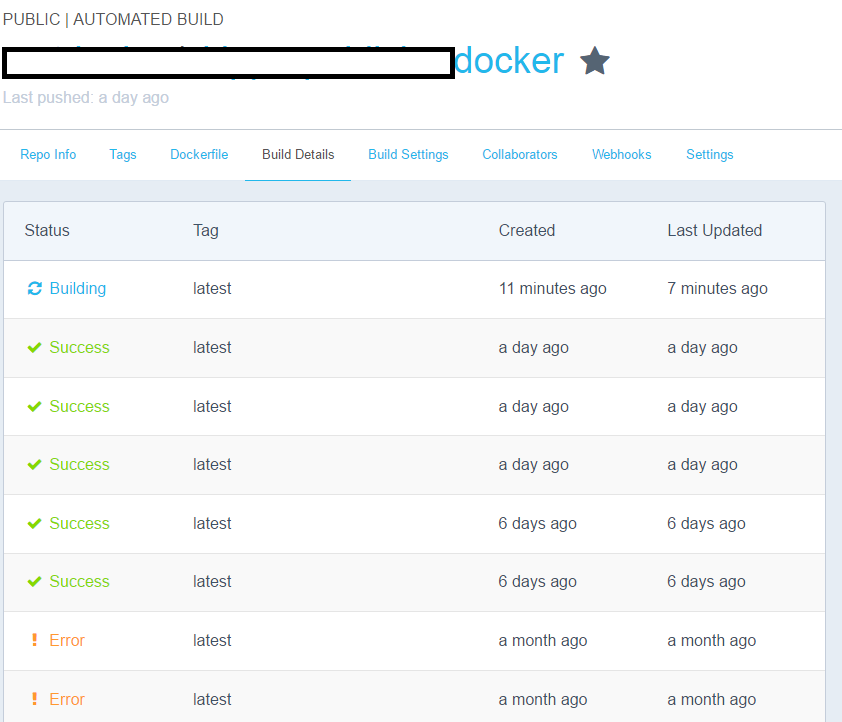
More than that navigate to the “Build Details” on the on the Automated Build repository – Docker-Hub website. We will see the Automated Build results.
- The current build identifiers
- The Build Code
- The used Dockerfile
- And the execution Log
Now we need a containers platform to run it. I decided to use the Apache Mesos open source solution, when the cluster located on Azure cloud.
- Mesos
- Create the Mesos cluster manager.

- Press on the + New link
- On the search box write “Azure Container Service“

- The filter slide will open with the “Azure Container Service” text.
- Select the DC/OS on Azure container.

- Press the “Create” button.
- Tag: create the SSH – Keys.
I put it as a Tag because it’s a sub-routing we need to preform before the DC/OS on Azure container creation.
For that I’m refereeing you to a helpful post I saw “Create SSH keys on Linux and Mac for Linux VMs in Azure“. Please navigate to the “Create the SSH Keys” section.
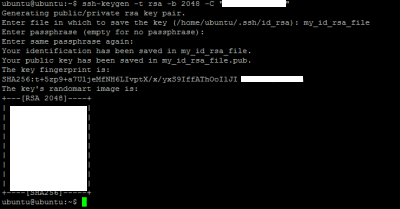
I summarize it with a terminal snippit.
The code for it will be:
1
|
## Run the ssh-keygen tool
| |
2
|
ssh-keygen -t rsa -b 2048 -C [User@Domain]
| |
3
| ||
4
|
## Give a name to create the file - I set it to
| |
5
|
## my_id_rsa_file
|
Now two files will create:
- my_id_rsa_file: with the private key data
- my_id_rsa_fiule.pub: with the public key data – This key will use us to create the DC/OS container.
⇒⇒⇒⇒⇒ Back to the DC/OS on Azure container creation.
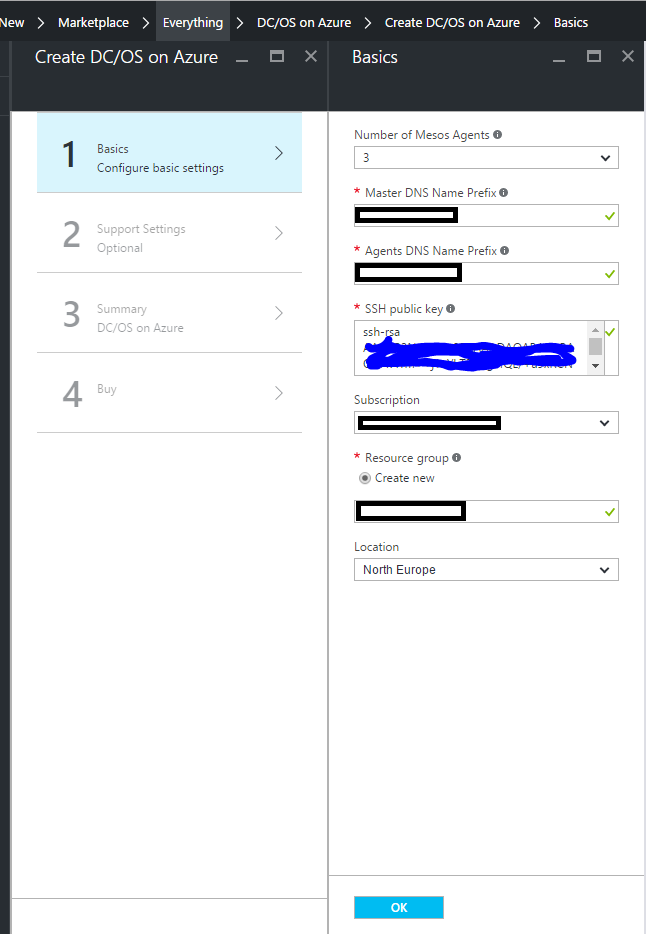
- First see that only the Basic stage is mandatory.
- Set the number of Agents to 3 or more.
- Use that SSH public key that you created on the previous step.
- Fill in the master, agent and resource group names.
Click Ok and create the container – wait for several minutes for the process to complete.
When deployment finished, navigate to resource-group, in this case dcos-name-rg.
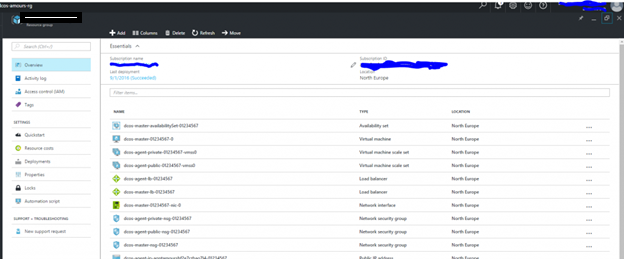
- Security issues – open ports configurations.
The deployed cluster is sealed and cannot be use on this configuration. We need to add inbound ports to the configurations.
- Master Load Balancer configurations.
- Click on the master Load Balancer line – this case dcos-master-lb-01234567.
- Press on the Inbound NAT rules link.
- Add new Rule:
- Name: HTTP.
- Service : HTTP (from the drop-down list).
- Protocol: TCP.
- Port: 80.
- Target: Chose the Doc-Master. Here dcos-master-01234567-0.
- Port mapping: Default.
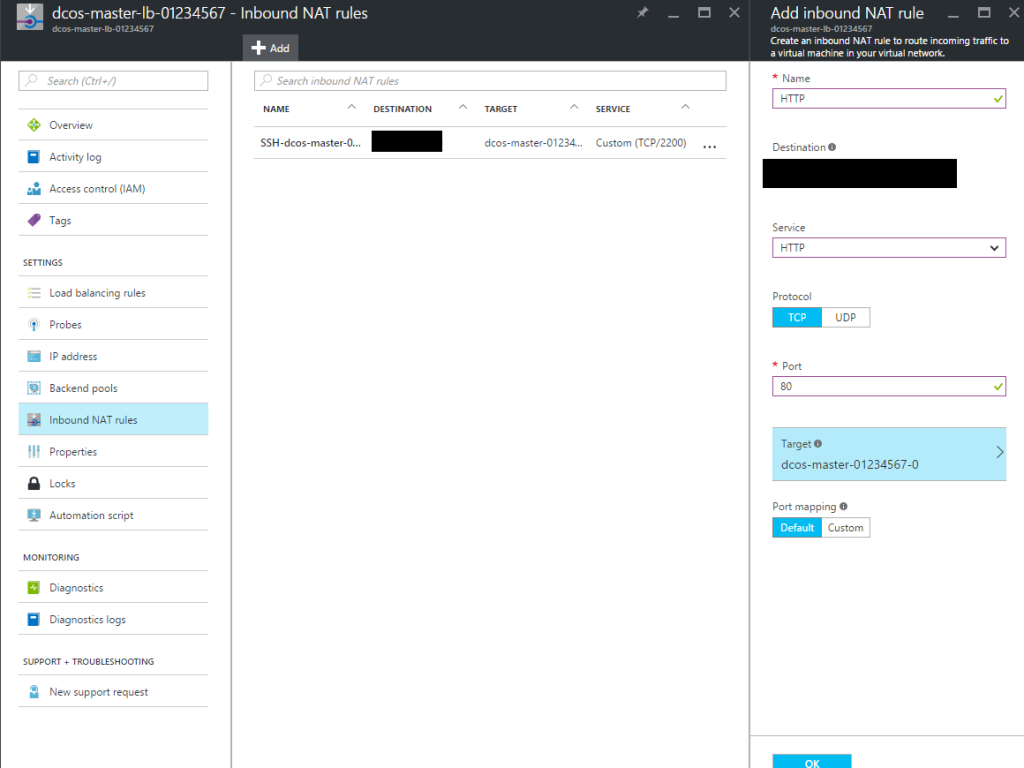
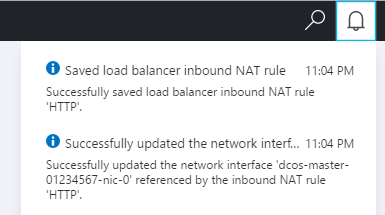
Press OK to add it.
*** Wait to the processes to finish before continue on!!!
- Master Network Security Group configurations.
- Click on the master Network Security Group line – this case dcos-agent-public-nsg-01234567.
- Press on the Inbound security rules link.
- Add new Rule:
- Name: HTTP.
- Service : HTTP (from the drop-down list).
- Protocol: TCP.
- Port range: 80.
- Action: Allow.

Press OK to add it.
*** Wait to the processes to finish before continue on!!!

Now we good to go.
- Step 3: Open the DC/OS Portal.
- Click on the master Load Balancer line – this case dcos-master-lb-01234567.
- Press the Overview.
- Copy the Public IP address.

- Navigate to this address

- Add Chronos package.
First as you saw from the Dashboard the Marathon (A container orchestration platform for Mesos and DCOS) already installed. In fact the other packages runs via the Marathon scheduler which rise it and keep it up.
On the other hand we have the Chronos, a fault tolerant job scheduler for Mesos which handles dependencies and ISO8601 based schedules.
*** If your Docker application should run all the time – always alive. The build-in Marathon is all you need. If we talk about schedule small jobs install the Chronos for it.
Install the Chronos package.
- On the DC/OS portal press on the Universe link.
- Install Chronos package.

- Wait for a minute or two and press the Services link.
- You will see that both Marathon and Chronos services are running and Healthy.

- Setup Chronos job.
- Press on the Chronos service from the Services panel.
- Than press the “Open Service” button (purple).

- On the opened window press the + New Job button and a Card to fill the the job details will be open.
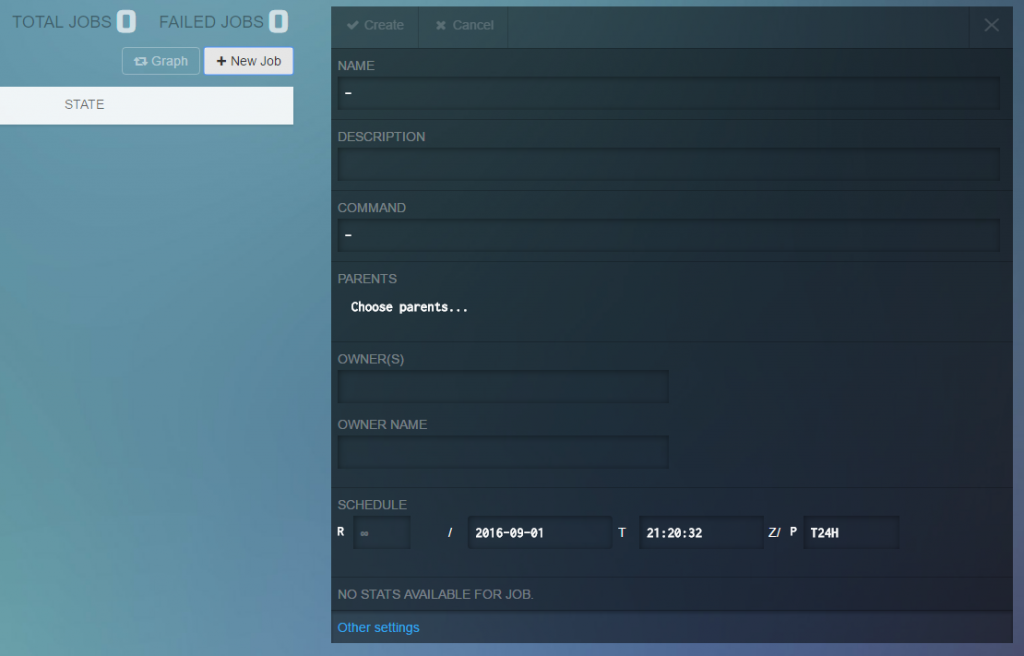
Populate the Job Card.
- Name: Give your job a name (Run Test).
- Description: … (Run Demo Java Application).
- Command: full command with the docker name as specified on the Docker-Hub. Also you can pass here the incoming parameters. I’m passing : sudo docker run haimbentouza/docker_java_app Docker_on_Mesos, when:
- haimbentouza/docker_java_app: The Docker name on Docker-Hub.
- Docker_on_Mesos: The incoming parameter to the Java Application.
- Other parameters set as you go, I set the Docker to run each 5 minute (T5M).
*** Before saving it open the browser Developer Tools (F12 on Chrome). We want to capture the REST call which create the Job.
- Press the Create button.
- The Job will be execute and run (the iteration runs count the success and failures)

COMMAND:
sudo docker run haimbentouzahub/haimbentouzadocker/skipperpublisherdocker wget location/application.jar /home/ | java -jar /home/application.jar <params>
*** On the browser Developer Tools (F12 on Chrome). We captured the next REST call which create the Job.
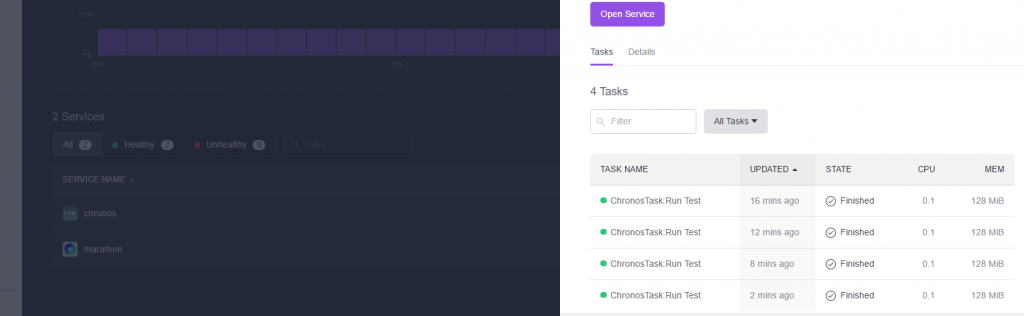
- Validate the Docker execution.
- Navigate back to the Mesos portal to the Services panel.
- Once again press the Chronos service link.
This time you will see all the executed tasks. With the task name, state,CPU, Memory and the elapsed time from the run.
Commentaires
Enregistrer un commentaire